This is a comprehensive guide to using the Work Panel – your work hub in Kaamfu. The Work Panel is designed to make task and project management seamless and collaborative. The Work Panel is easy-to-navigate design allows organization owners and managers to structure work across multiple departments. When employees are added to your workspace, they can easily navigate to their tasks and complete them. The sleek design also allows users to converse with team members as well as management-level staff in contextual chats.
Functions of Spaces, Boards, and Items #
To get started, it is important to know that the work panel is divided into Spaces, Boards, and Items.
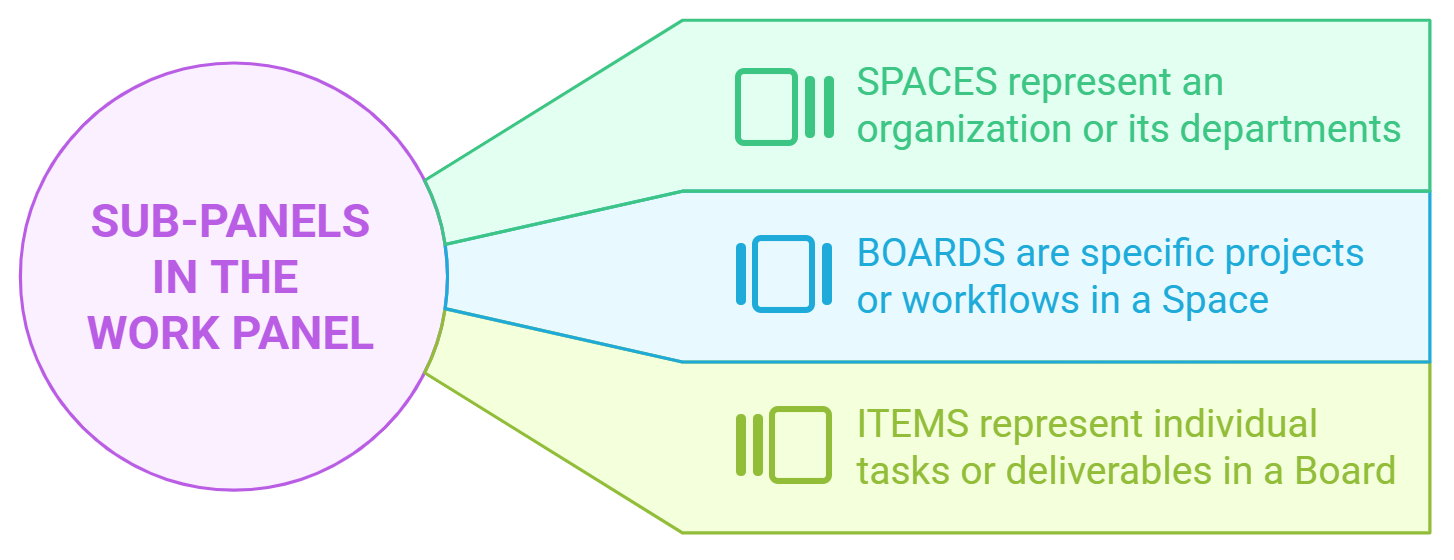
These sub-panels allow you to keep departments, projects, and tasks organized.
Spaces – This sub-panel is at the top of the work hierarchy and it corresponds to your company’s departments. Within this sub-panel you can create groups and move items amongst them.
Boards – Just like a department in an organization can have multiple responsibilities and projects, a Space can have multiple boards underneath it.
Items – This sub-panel is where you will create and assign tasks associated with a department or project.
Tip: You can toggle between a full-screen and a panel-mode of the Work Panel. To do this, hover your cursor over Work on the Navigation Panel and click the icon that slides out.
Common Features of Spaces, Boards, and Items #
Before we dive into how to use the Work Panel, let’s look at some features that are common in the Spaces, Boards, and Items sub-panels.
Groupings #
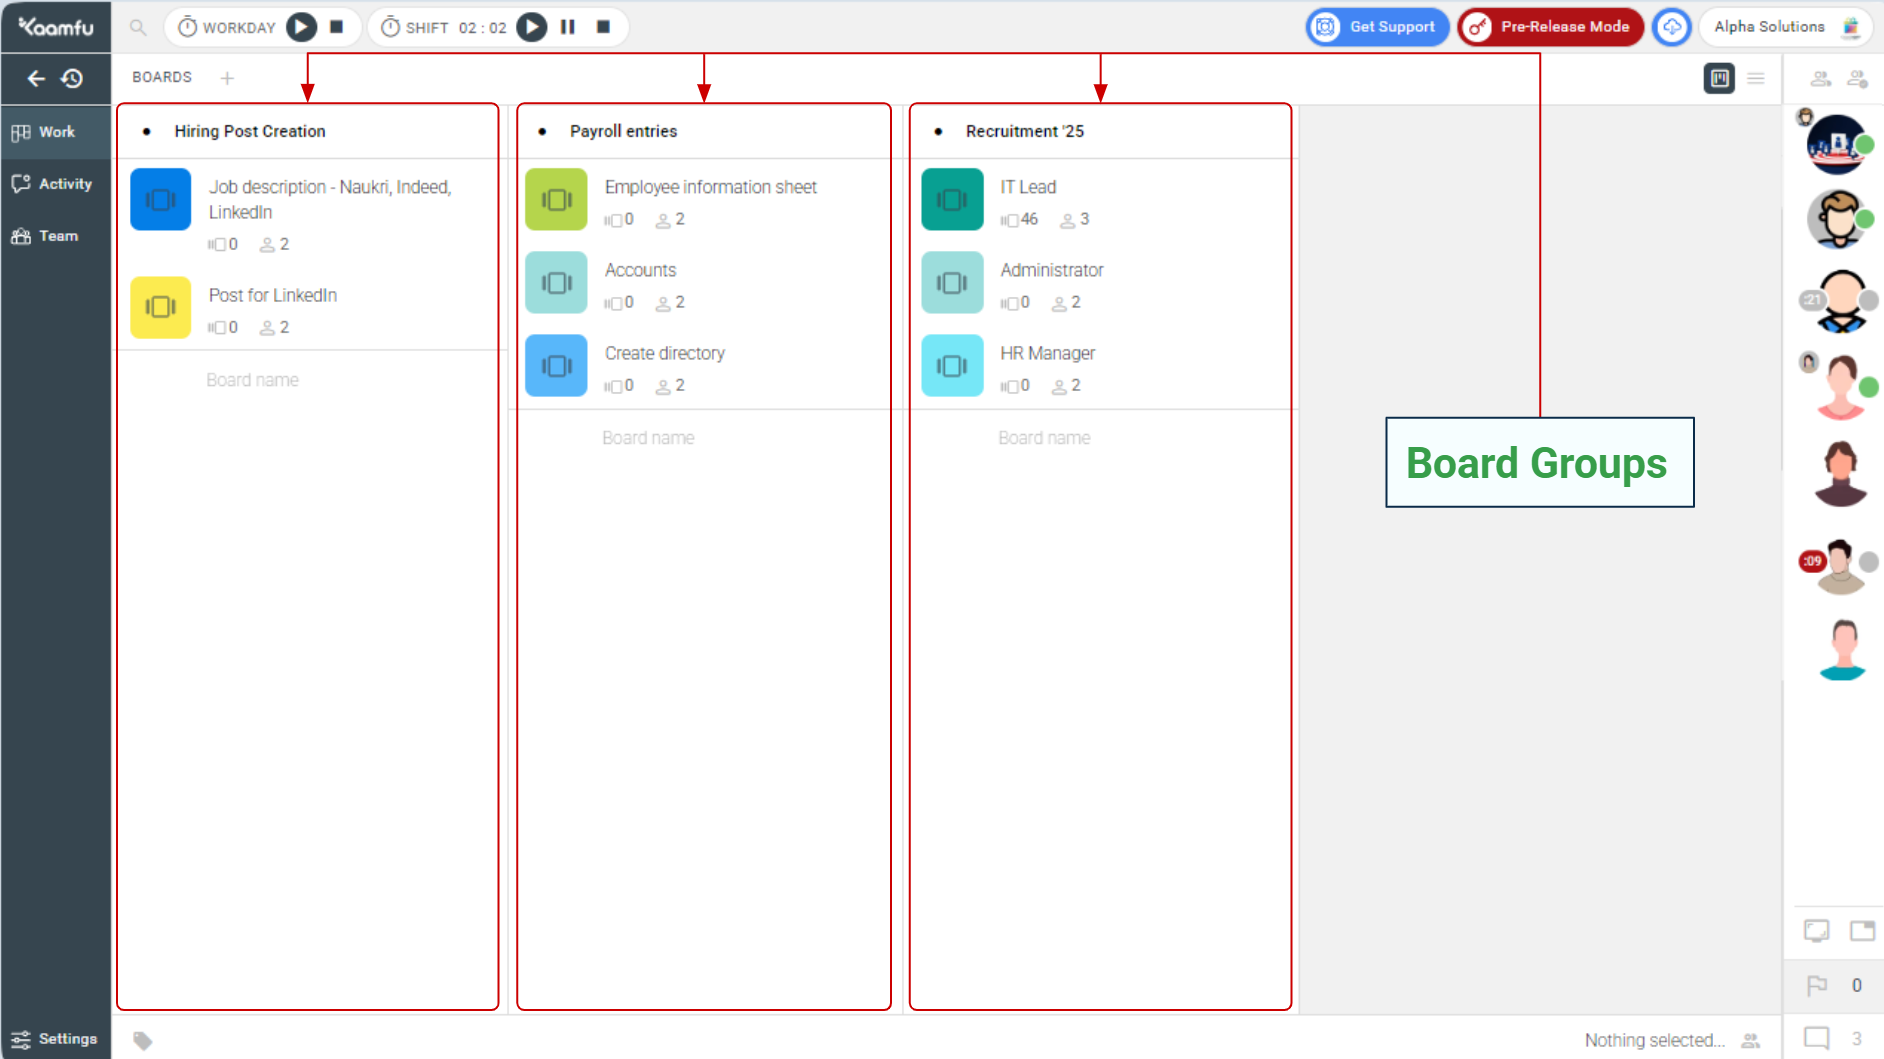
In each sub-panel, you can create groups – Space groups, Board groups, and Item groups. This is to keep departments, projects, and tasks organized. For example, you can create a space group called Departments, underneath which you can further create individual spaces like HR, Marketing, IT, Operations, etc. The same goes for Boards and Items.

Kanban Design #
With a Kanban-style layout, you can easily drag-and-drop Spaces, Boards, and Items between their respective groups. This creates a smooth visual flow for easier project tracking and adjustments.
Column Actions #
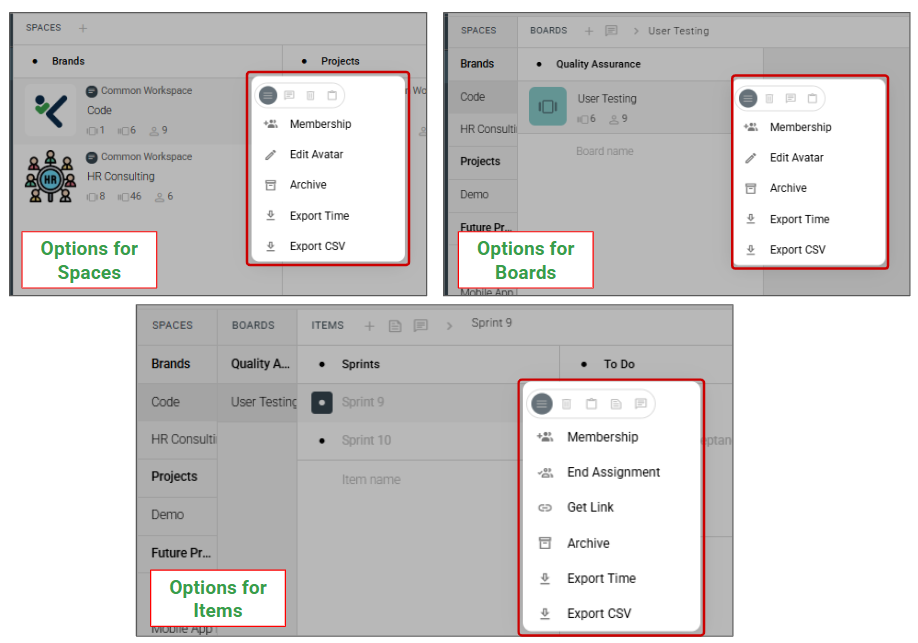
When you click on an item in any of the sub-panels, you get access to column actions. These include the following options:
- Delete – Remove the item from the group
- Copy and Move – Copy and move the item amongst groups
- Conversation – Access the conversation related to the item
- Notes – Access the Notes section of the task (this option is only available for Items)
- Membership – Add or remove members who have access to the item
- Edit Avatar – Change the display image of the Space (this option is not available for Items)
- Get Link – Copy the link to the item (this option is only available for Items)
- Archive – Archive the item
- Export time – Get time-stamped data related to the items for a defined period of time
- Export CSV – Get all data related to the item
Creating a Space #
- Click the plus icon next to Spaces on the Work Panel
- A pop-up window will appear with different workspace options. Click Common Workspace and then click Create.
- Enter a name for the Space that best describes its purpose, for instance, HR, Marketing, IT, etc.
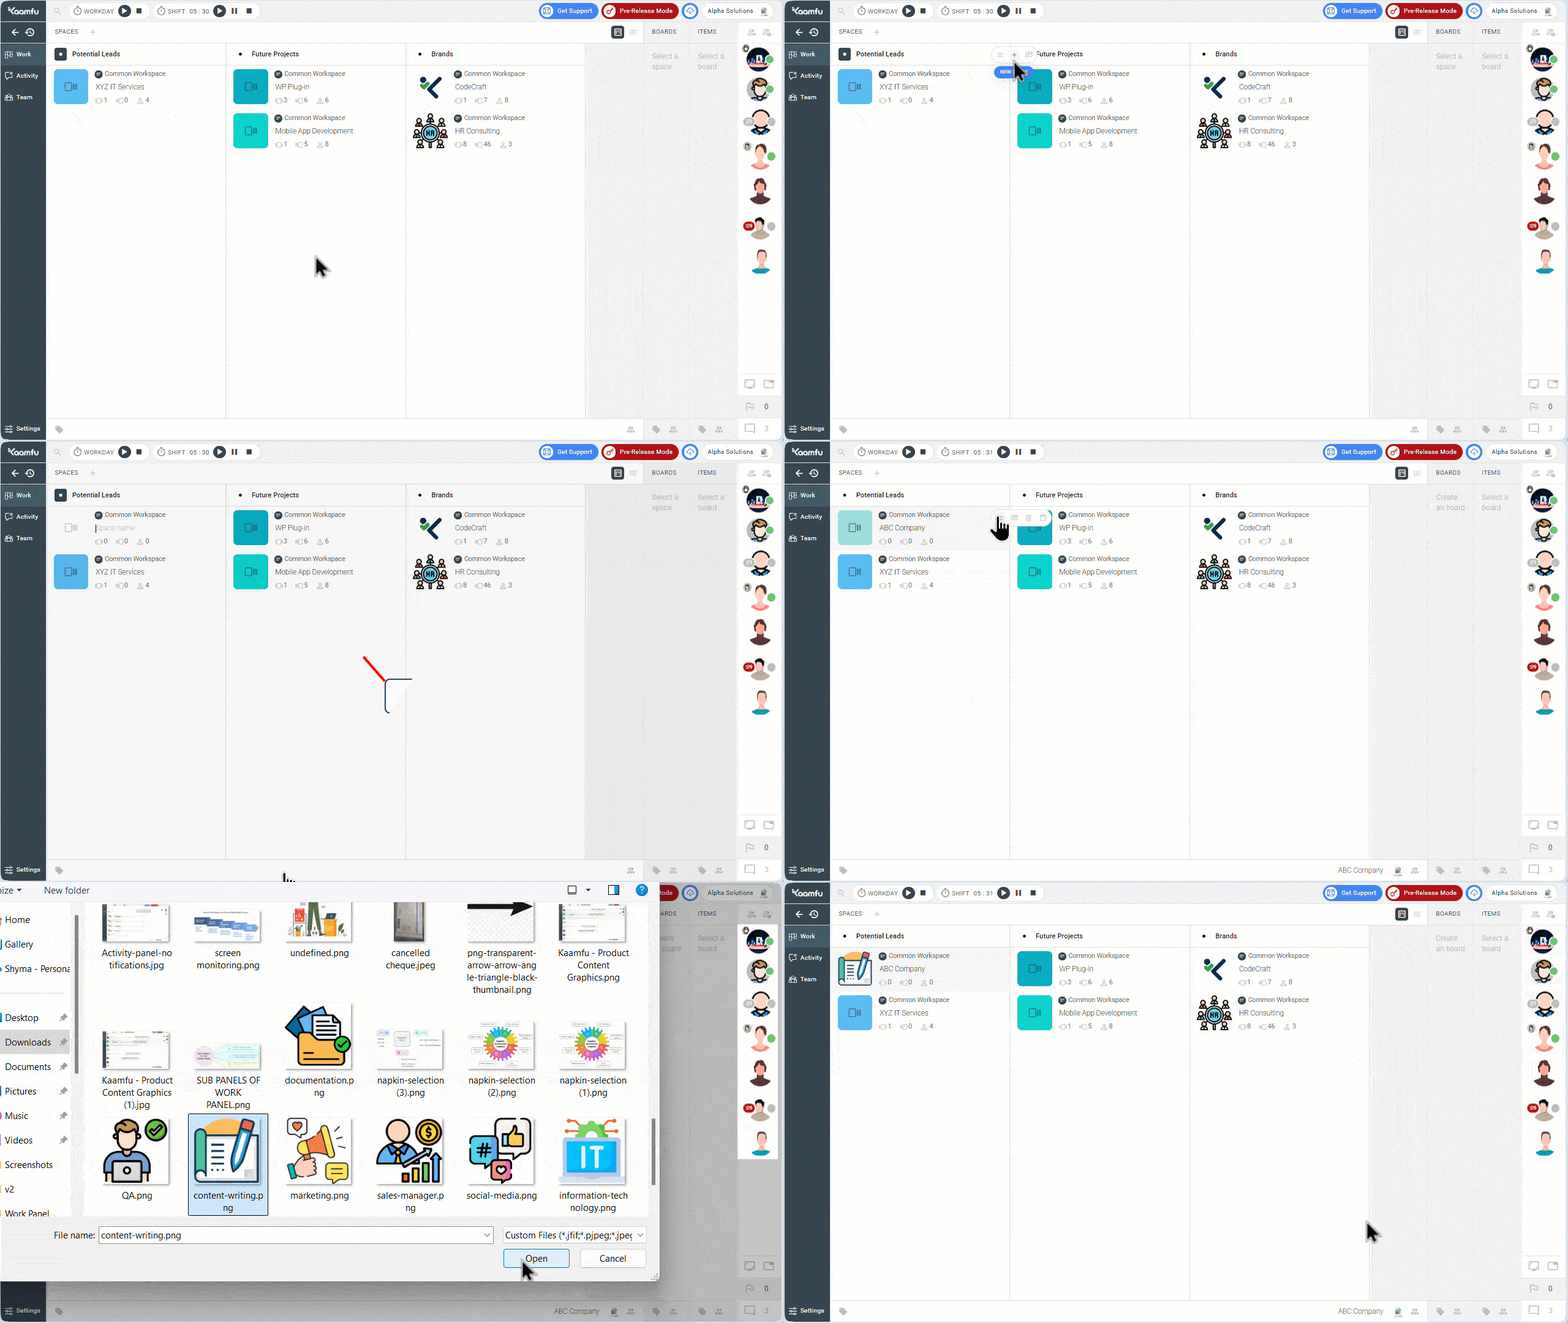
This creates a new Space in a Space group. This way, you can go ahead and create more Space groups, and within each group create Spaces.
Creating a Board #
- Navigate to the Space in a space group in which you want to create a Board.
- Click on the Boards Panel and then click the plus icon.
- Enter a name for the new Board that corresponds to the department’s roles or projects.
- Press enter to create the Board.
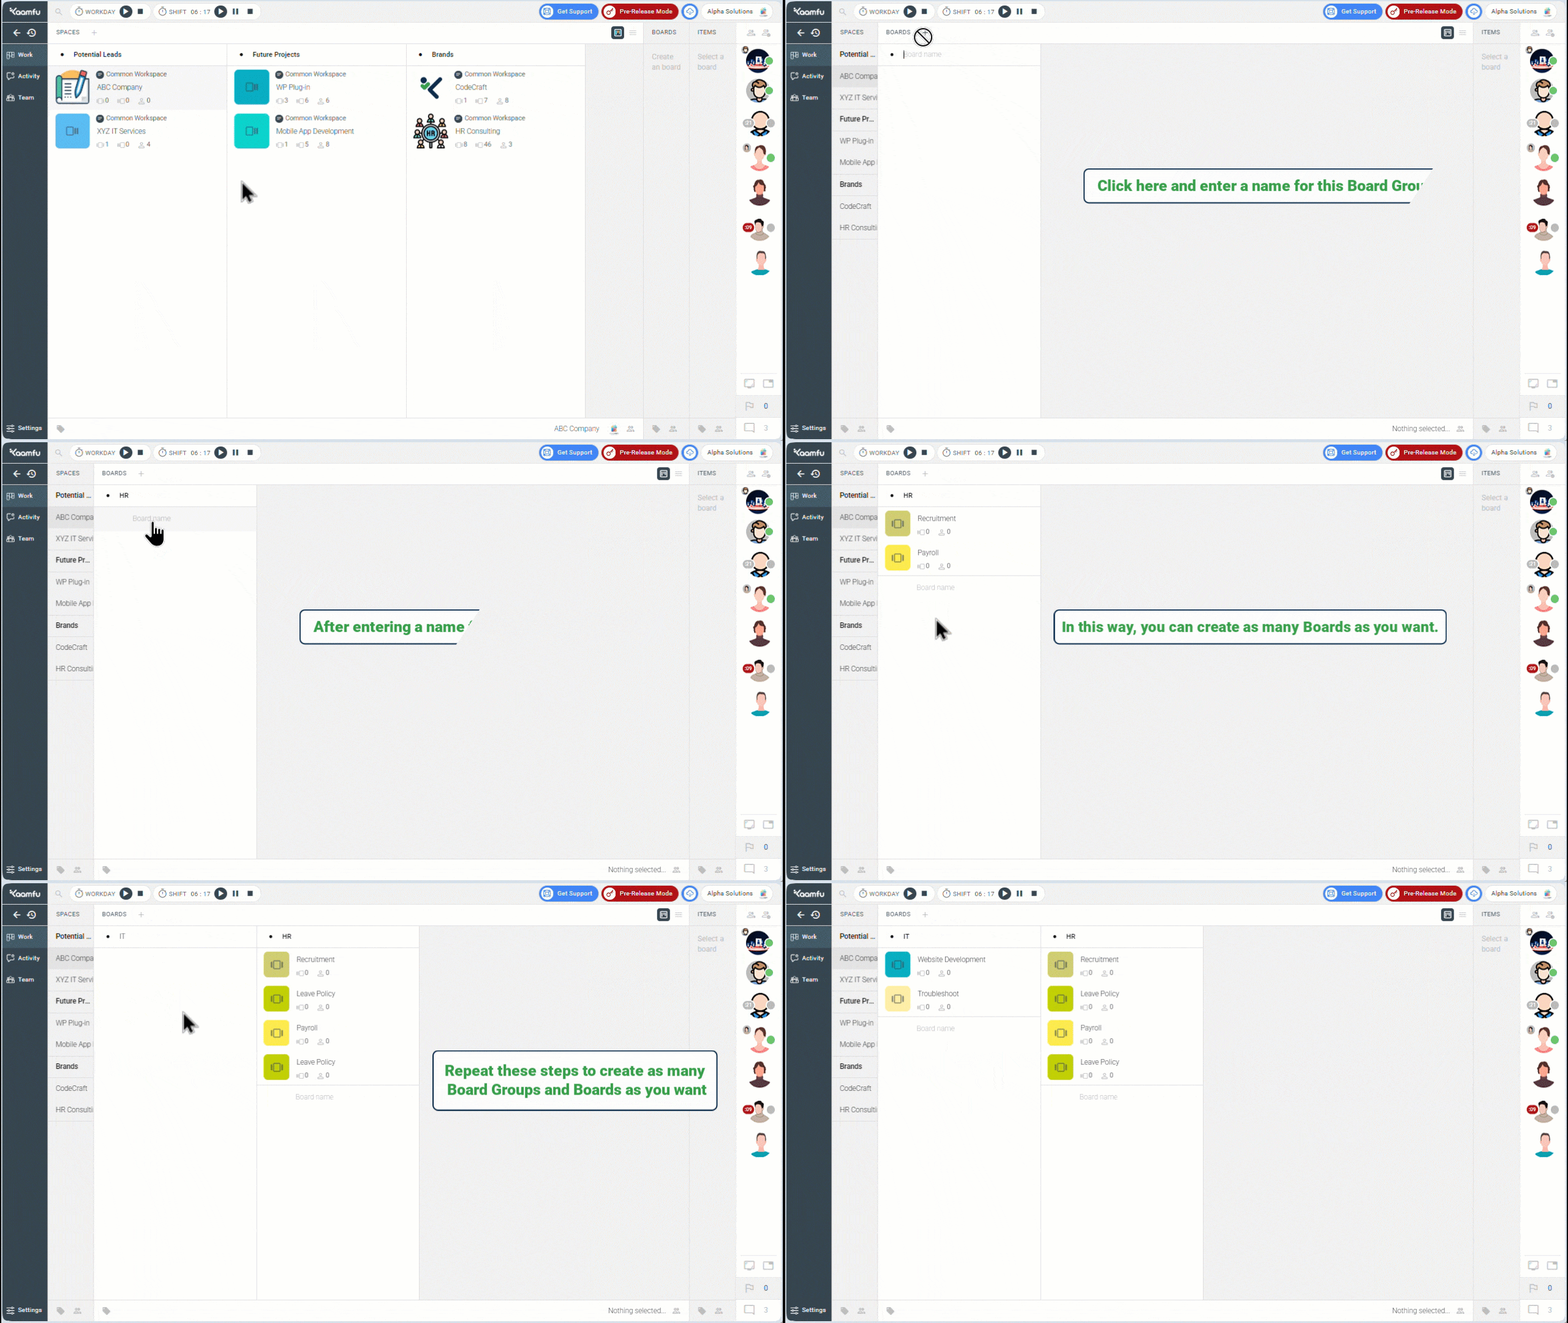
This creates a new Board in a Board group. This way, you can go ahead and create more Board groups, and within each group create Boards.
Creating an Item #
While you’re within a Board, if you click on the Items panel and then click the plus icon, a new item will get created. Enter a name for this item that corresponds to a task in the Board.
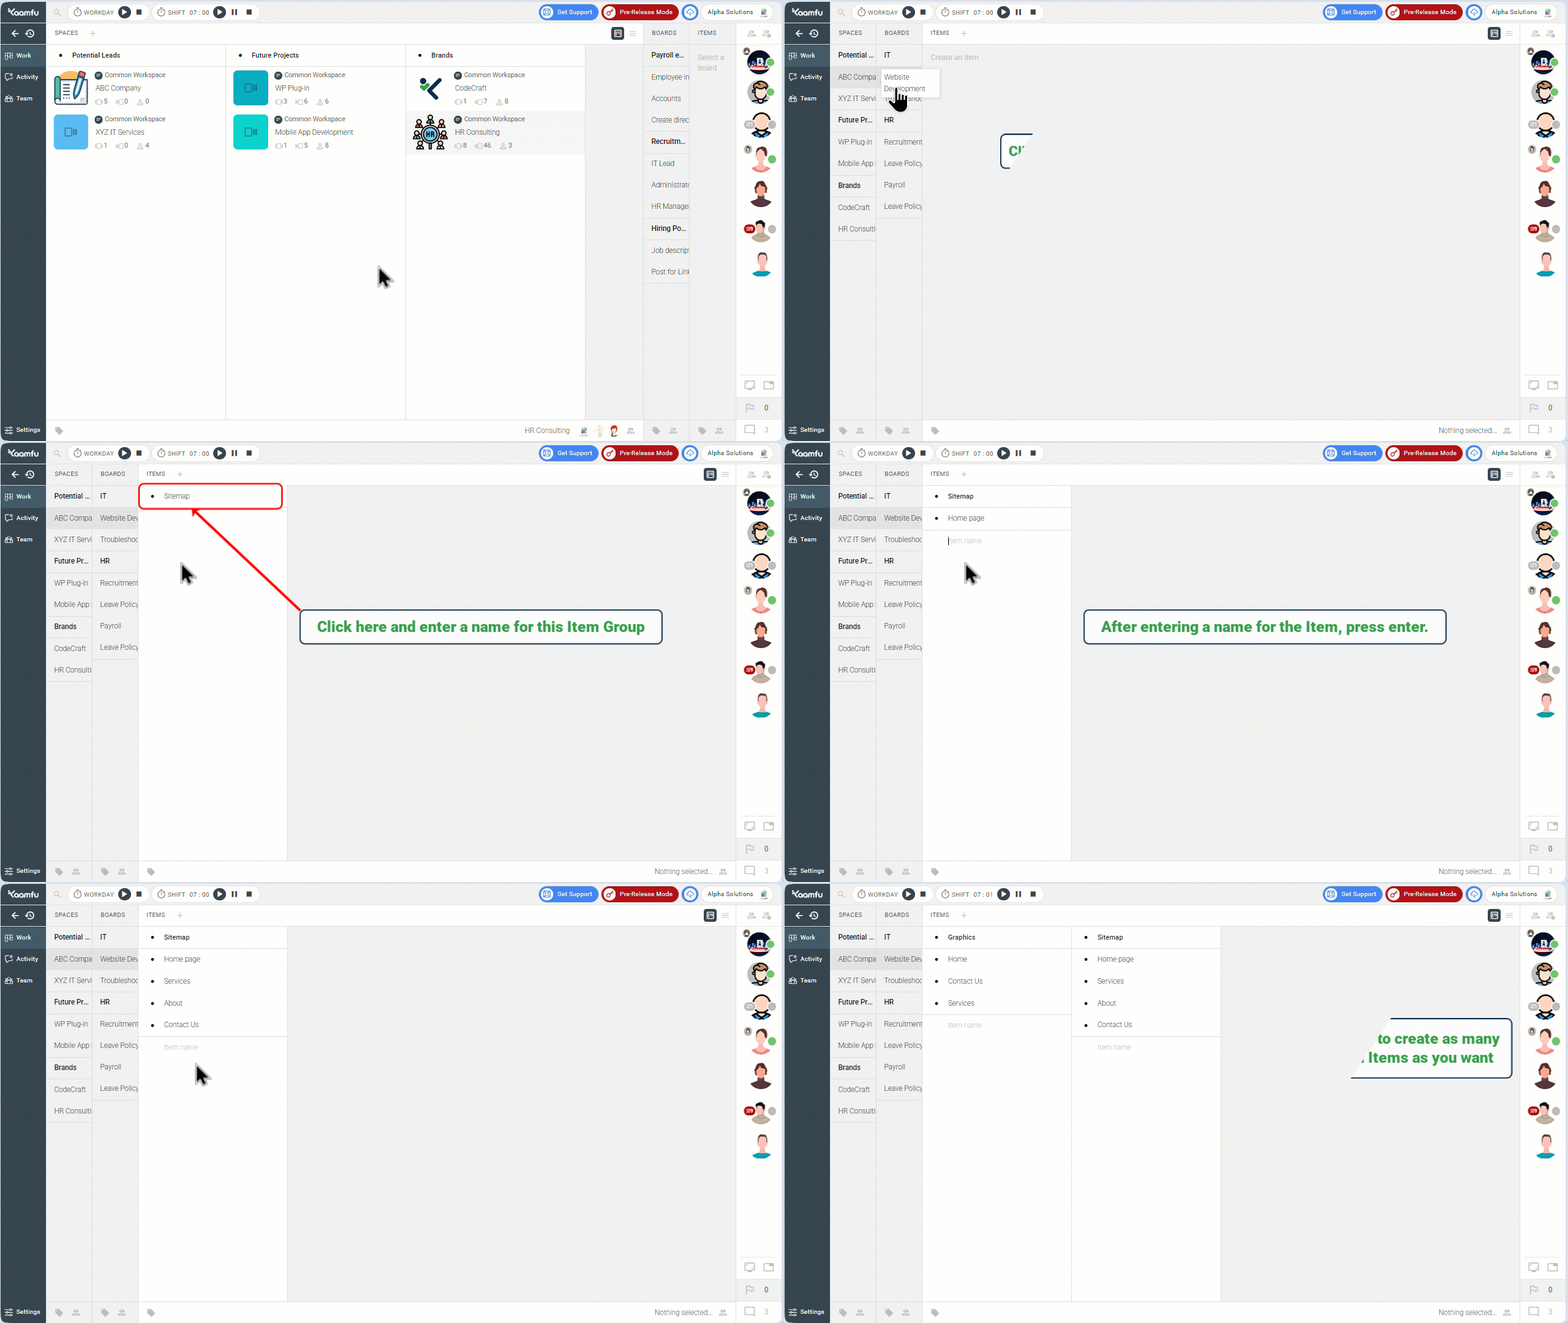
As with Spaces and Boards, you can access various options by simply hovering your cursor over an item. Move tasks amongst item groups as they progress, get completed or face a blocker.


